How to create homemade Flash Cards with Microsoft Word
Do you remember your mother bought you fancy Flash Cards to help you memorize your addition and multiplication tables, or important historical information like “Who is buried in Grant’s tomb?” Hint: It was Grant.
Now that you are in the information age, you can buy them online. Or, if you want to save some money and prove your computer expertise, you can create your own flash cards using Microsoft Word.
Following the instructions below, you can create a Flash Card template that can be used repeatedly to create a page with ten 3 ¾” x 2” cards per page. This template will consist of two pages with narrow margins, and a table of 2 columns and 10 rows.
Begin the document:
In this section you will start Microsoft Word and set the margins and other layout settings for your template.
- Start Microsoft Word.
These instructions are based on Microsoft Word 365 on a Windows 10 PC. Instructions for other versions, since Word 2010, should be similar.
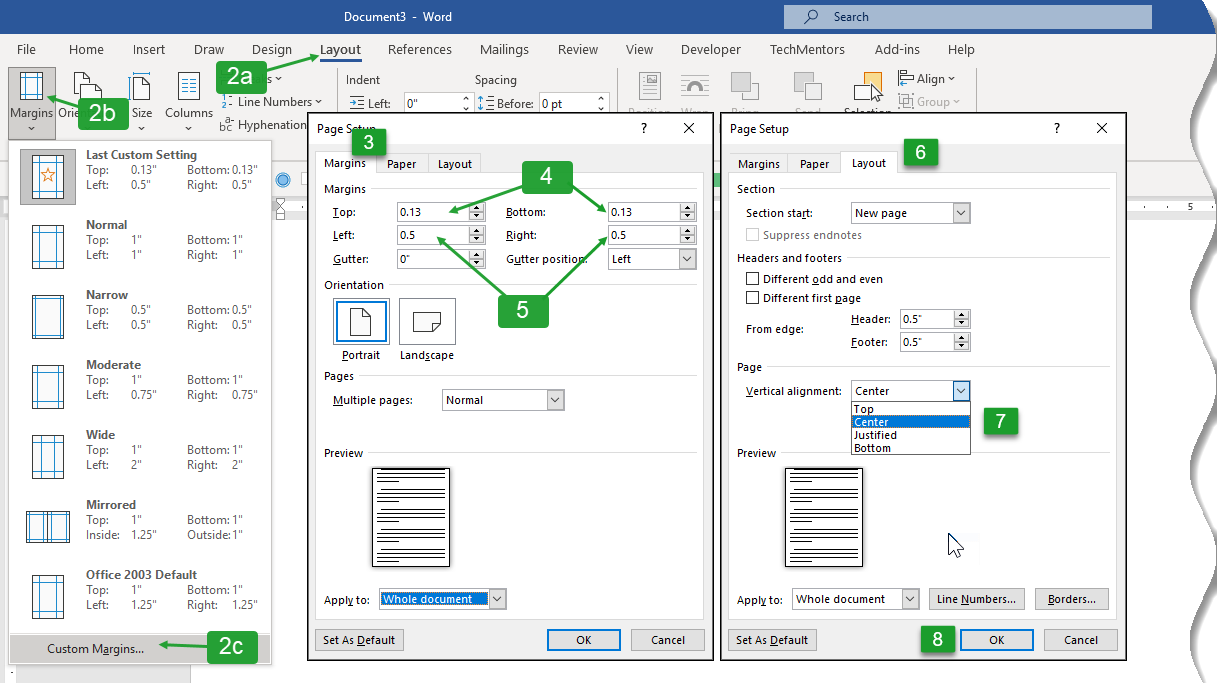
- From the ribbon, select Layout, Margins, Custom Margins.
- If necessary, click on the Margins tab.
- Set the Top and Bottom margins to 0.13″.
- Set the Left and Right margins to 0.5″.
- Click on the Layout tab.
- Set the Vertical alignment to Center.
- Click OK.
Create the table:
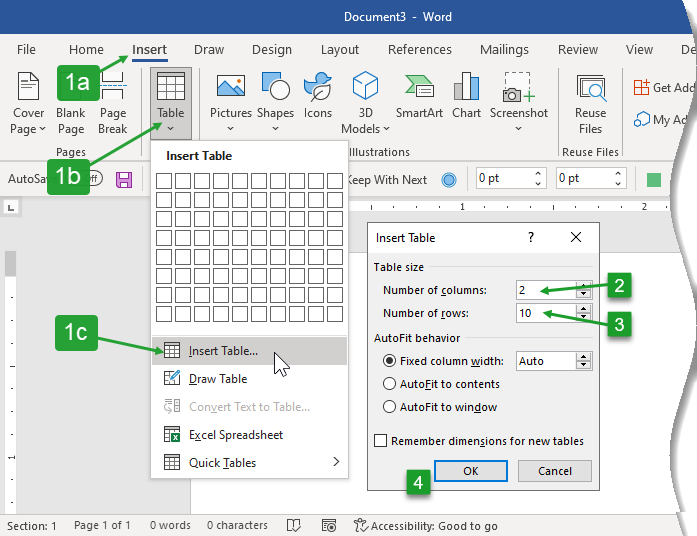
Here you will create a table with 10 rows and 2 columns.
Change the table’s dimensions:
In this section you will change the table’s dimensions so each cell is 3 ¾” wide by 2” tall.
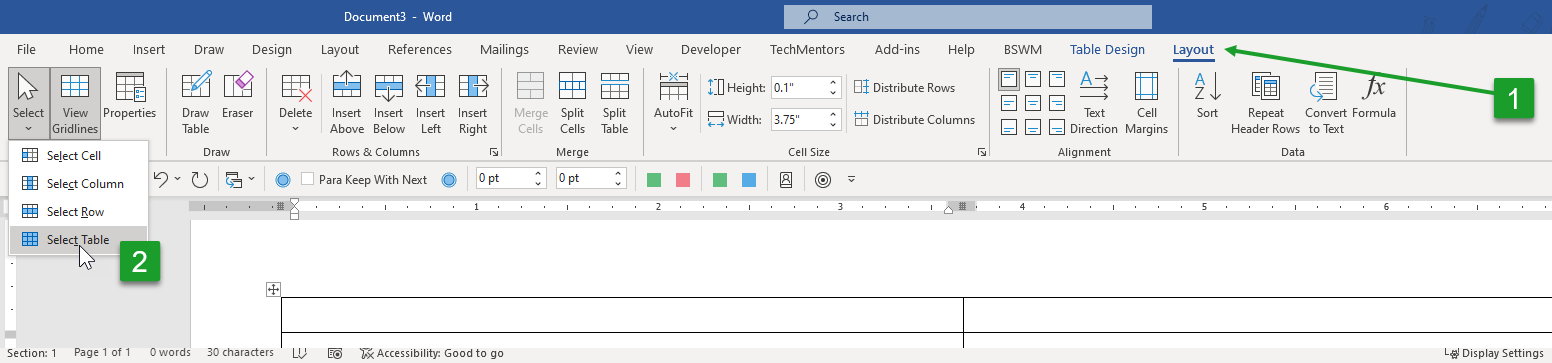
- From the ribbon, select the Table’s Layout tab.
- Click Select, Select Table.
- From the ribbon Table’s Layout tab, click Properties.
- If necessary, click the Table tab.
- Click the Options… button.
- Check the Allow spacing between cells option.
- Set the Allow spacing between cells size to 0.13″.
- Click OK.
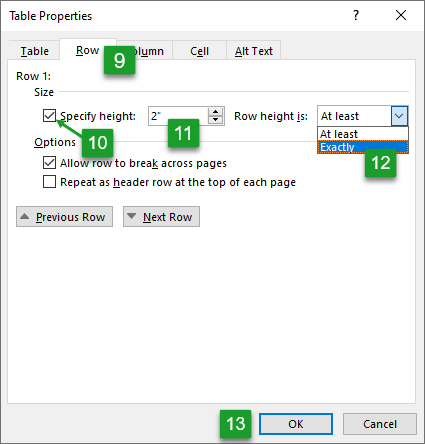
- Click the Row tab.
- Check the Specify height box.
- Set the height to 2″.
- Set the Row height is to Exactly.
The Exactly setting prevents the cells from getting taller if a user enters too much text.
- Click OK.

 diagram Description automatically generated with medium confidence" width="736" height="129" />

Change the tables borders
In this section you will remove the border that surrounds the whole table, but keep the border that surrounds each cell.
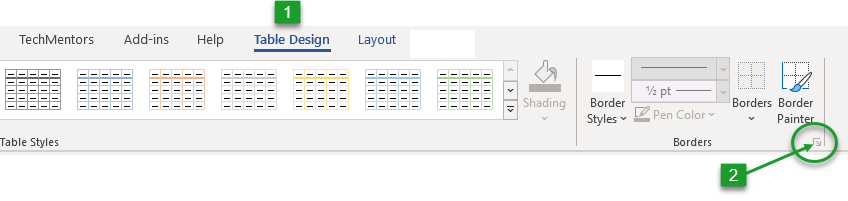
- From the ribbon, select the Table Design tab.
- In the Borders section bottom right corner, click the dialog box launcher arrow.
- If necessary, change the Apply to drop down to Table.
- Click the None button to remove all borders.
- Click the inner horizontal lines button.
- Click the inner vertical lines button.
- Click OK.

Set up the font and alignment of each cell:
Now you will set the alignment within each cell so it is centered both vertically and horizontally. You will also change the font size to 36 pt, which is ½” tall.
- From the ribbon, select the Table’s Layout tab.
- Click Select, SelectTable.
- From the ribbon Table’s Layout tab, in the alignment section click the center icon.
- From the ribbon, select the Home tab, set the font size to 36 pt.


Save your file as a Flash Card template:
You now have a document that is ready for your questions and answers. However, since you don’t want to repeat each of those steps each time, you will now save the document as a Microsoft Word template. A template is “a sample document that has already some details in place.” For another template example read TechMentors’ Valentine’s Day Templates blog post.
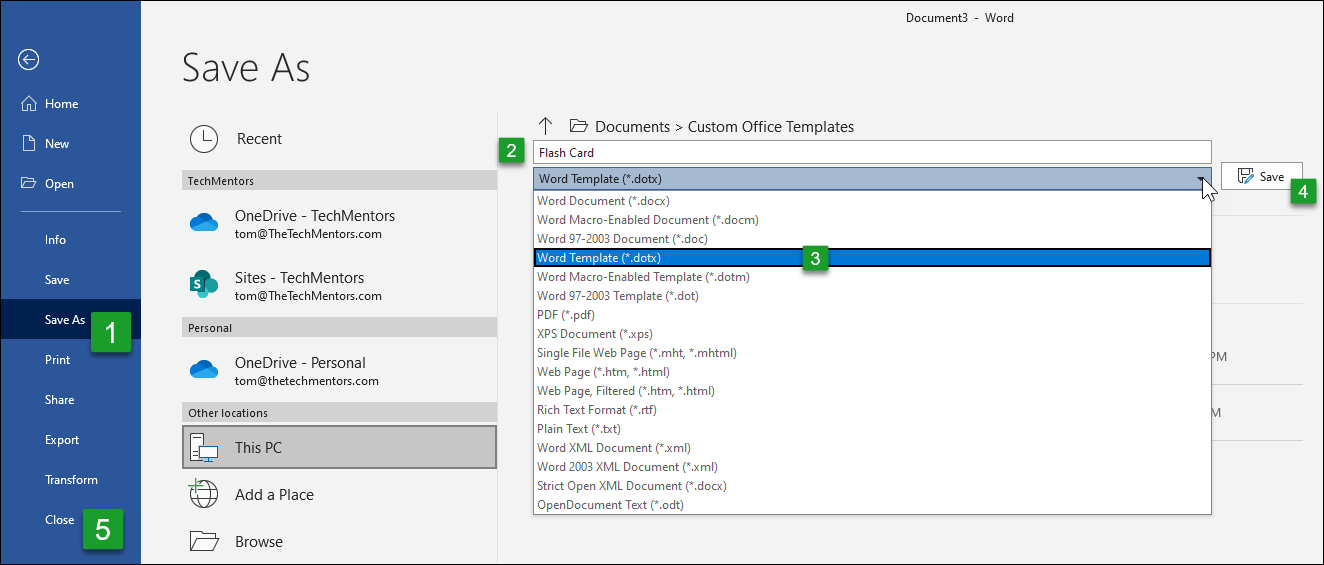
- From the ribbon, select File, Save As.
- In the box enter Flash Card as your file name.
- Click the drop down for the next box and choose Word Template (*.dotx).
- Click Save.
- From the ribbon, select File, Close to close the template.
Create a new document from your template:
Now that you have created your template you can follow these instructions to begin creating your flash cards.
- If necessary, start Microsoft Word.
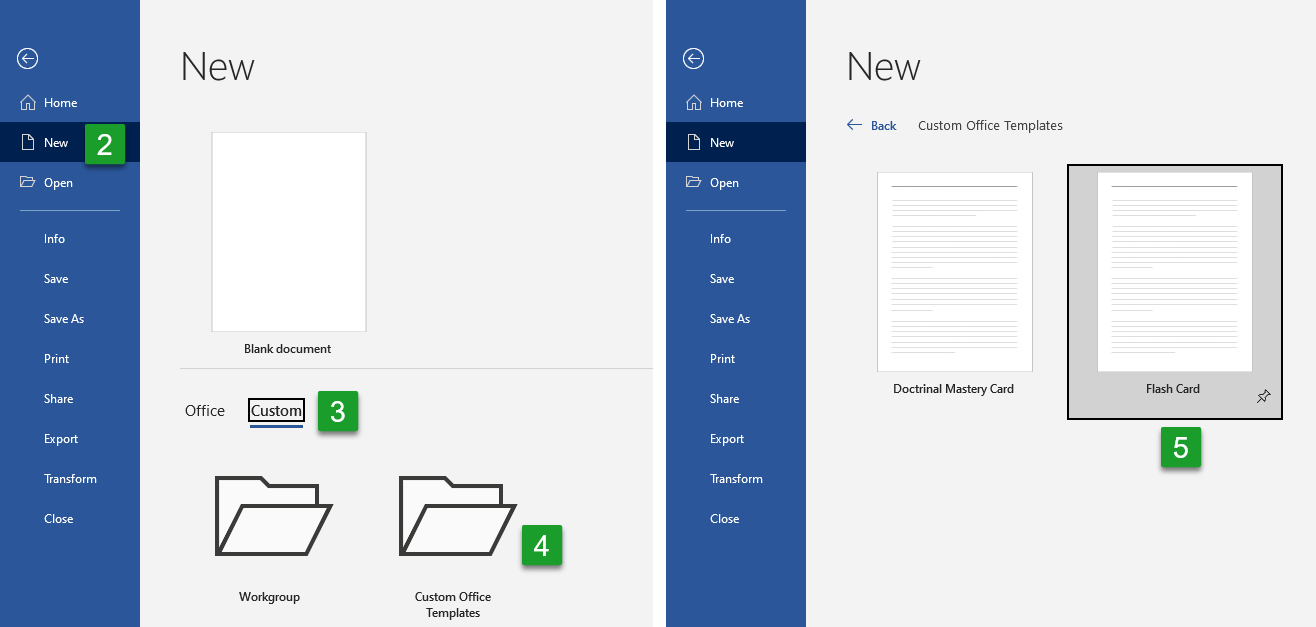
- From the ribbon select File, New.
- Click Custom.
- Click Custom Office Templates.
- Click Flash Card.
- You can now enter your questions on page 1, and the answers on page 2.
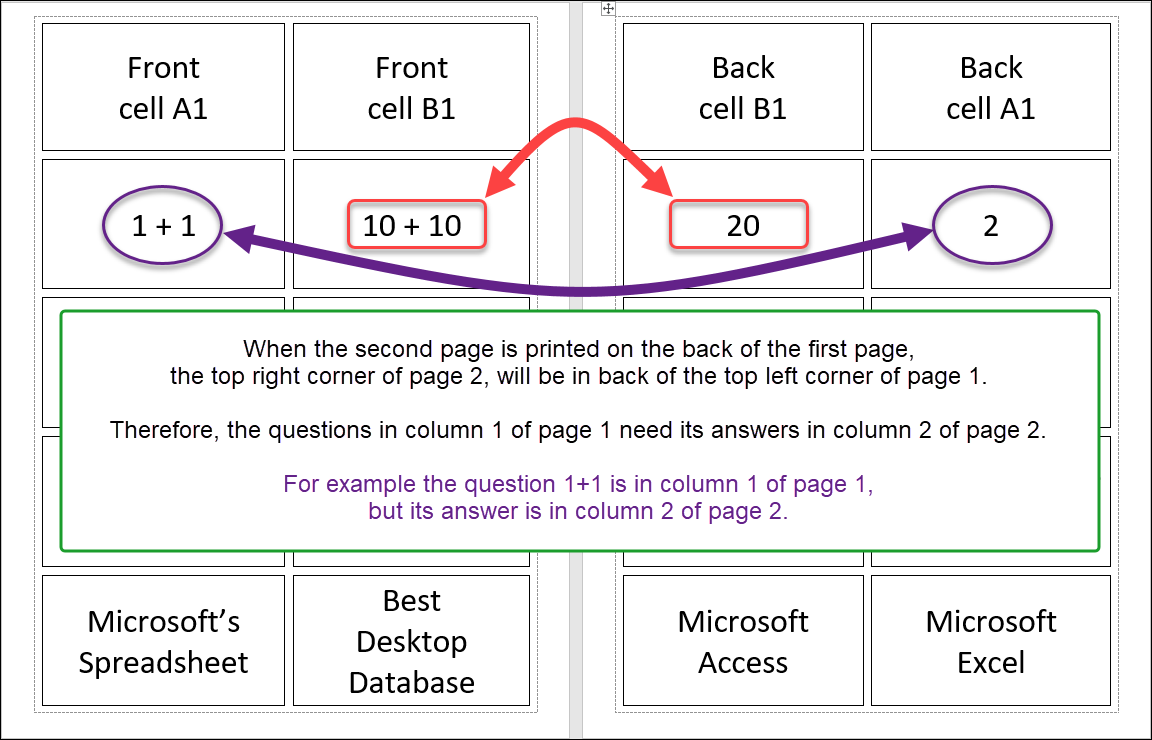
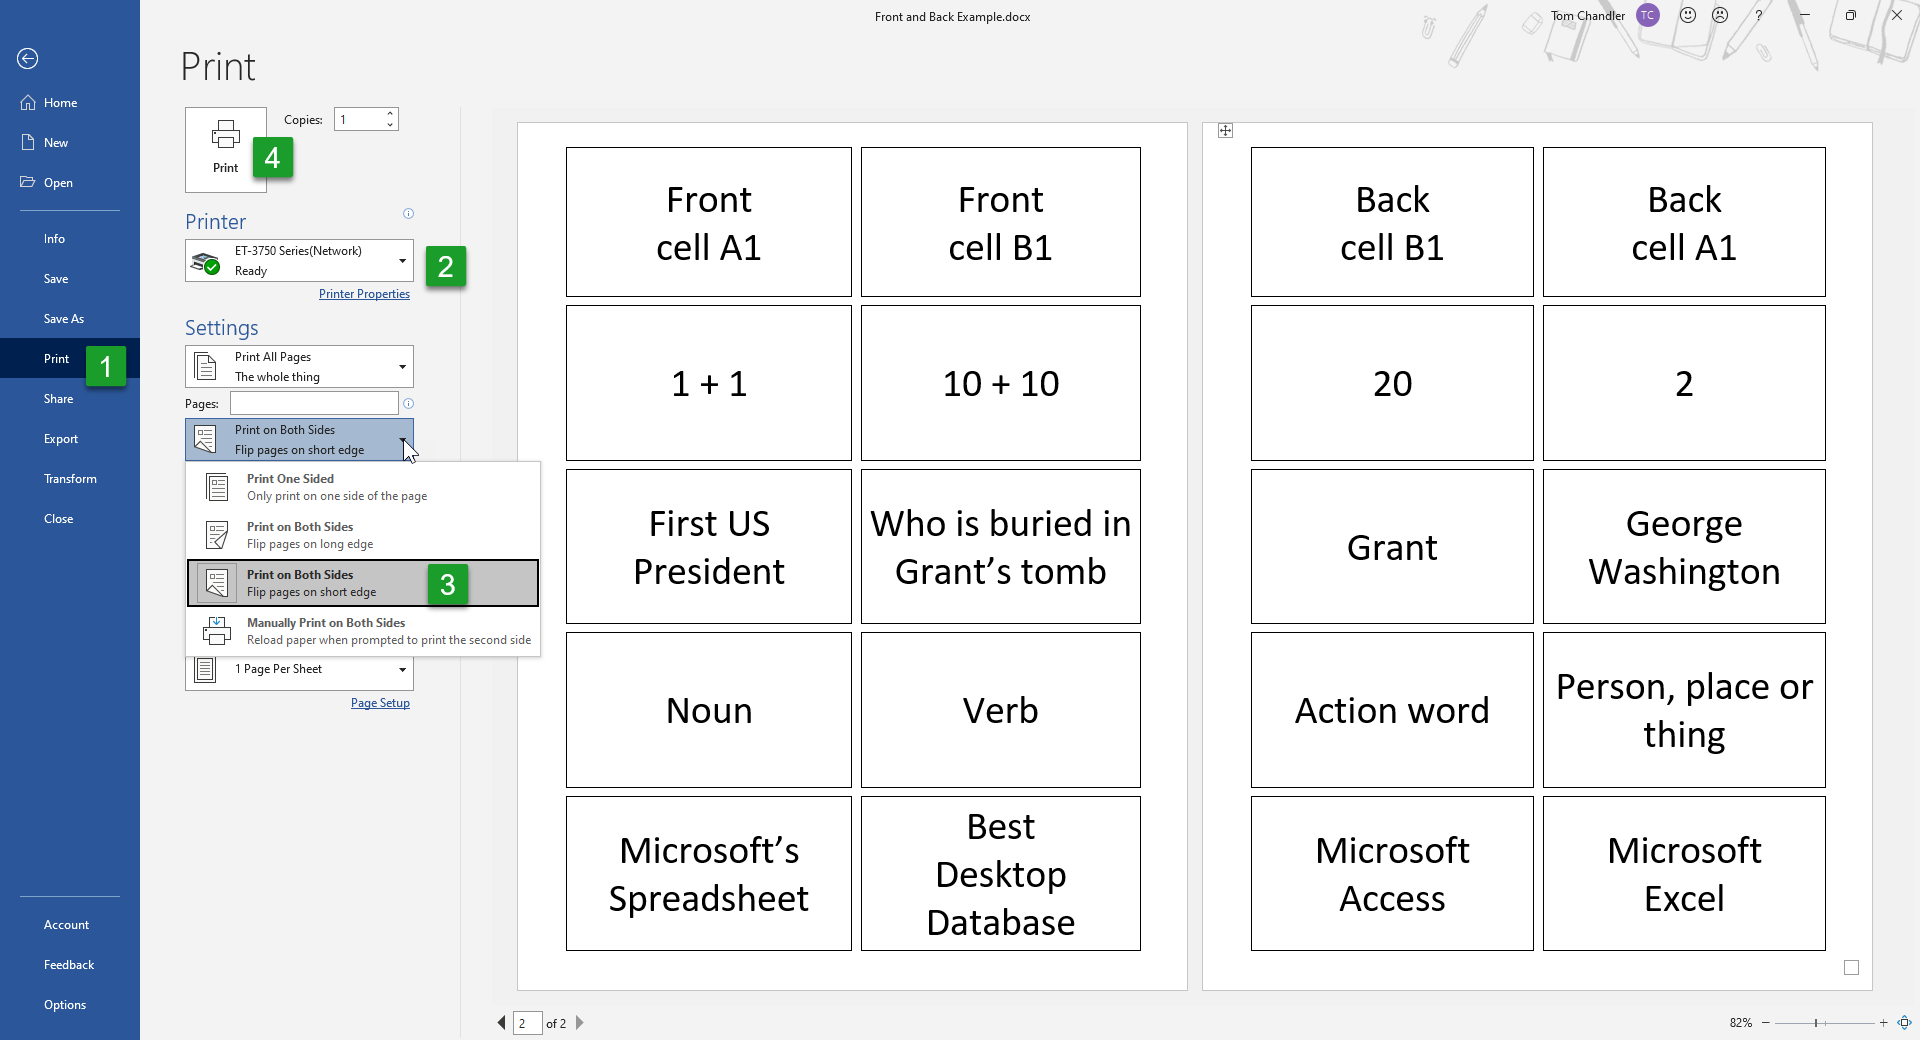
Note: If you want to print the answers on the backside of their corresponding question, then place the answers and questions in opposite columns of the odd and even numbered pages as shown below.
Printing with a double-sided printer
Follow these instructions if you have a printer that can print on both sides.
- From the ribbon select File, Print.
- Select your printer.
- In the settings area, click the second drop down, and choose Print on Both Sides.
- Click Print.
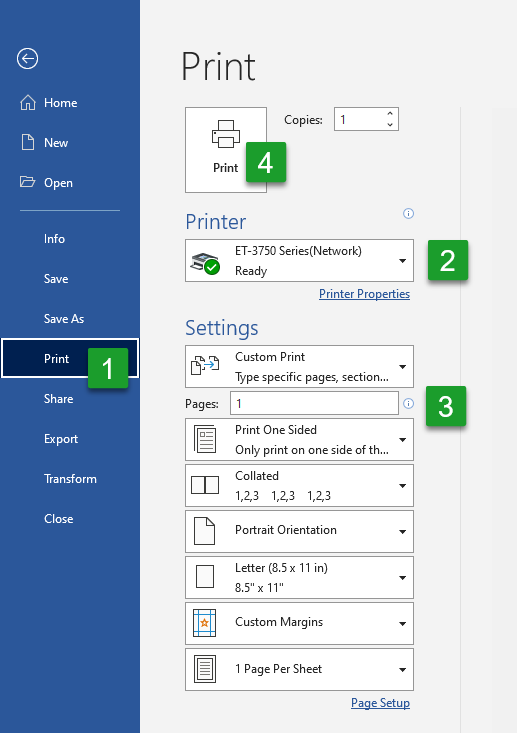
Printing with a single-sided printer
Follow these instructions if you have a printer that can print on only one side at a time.
- From the ribbon select File, Print.
- Select your printer.
- In the settings area, in the pages box enter 1.
- Click Print.
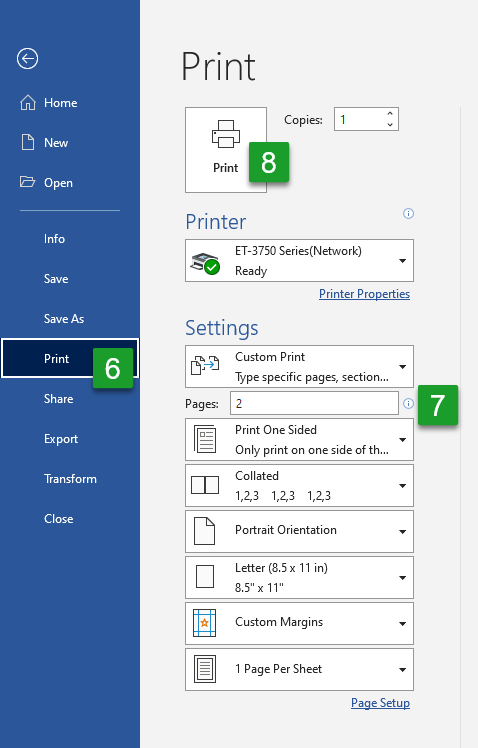
- After it prints, reinsert the page upside down in the printer’s paper bin.
- From the ribbon select File, Print again.
- In the settings area, in the pages box enter 2.
- Click Print.
Conclusion
Congratulations, you have created your own Flash Card template that you can use whenever you, or the aspiring students in your household, need to memorize important facts like “Who was buried in Grant’s tomb.”
Templates are a great way for businesses and individuals to save time and money. Schedule a complimentary consultation with a TechMentor and you too can save time and money.
Recent Posts
- Independence from political anger as shown on July 4, 1826
- Types of database tables
- How to cut and paste with an Excel VBA macro
- Excel Tip: Formatting with the keyboard
- How to create a simple and easy to use PivotTable in Excel
- Split an image with Microsoft Word 365
- Fixing Access Error 3048 – Cannot open any more databases
- How to create homemade Flash Cards with Microsoft Word
